
You can cast epoxy yourself
Casting epoxy yourself is easy
You can easily get started with epoxy casting yourself
You can cast epoxy yourself and it is in fact very easy to do. You can use epoxy to make Resin Art or decorative objects.
The process of casting epoxy is very simple. You add both components together in the right proportion. Then you can add pigments or glitters, to obtain the desired mixture. You pour this mixture into a mold. After curing, you have a beautiful object.
Epoxy casting is ideal for creating unique tables, kitchen countertops or other pieces of furniture. You create a unique piece every time.
You can find more information about casting with epoxy below.
What is epoxy?
Epoxy is a transparent, two-component product that can be used for many different applications.
After you mix the two components together, a chemical reaction occurs after which the epoxy hardens. Once cured, epoxy is very strong and adheres very well to almost all materials and surfaces. No wonder this is a top product for craftsmen.
In which applications can I use epoxy resin?
You can use epoxy to make resin art or decorative objects. Larger projects such as a river table or even large art objects are also possible. In this blog, we will take a closer look at how to make epoxy your first project yourself.
Epoxy casting is a great way to create unique and durable objects. Whether you want to make a table, a kitchen worktop, floor or even a sink, with epoxy you can make almost any idea a reality. All you need is a mold, epoxy casting resin and a little creativity.
What do I need?
Before you start pouring epoxy, it is important to have the right materials at hand. This includes:
- Epoxy resin
This is the most important part of casting epoxy. There are many different types of epoxy resin available, so it is important to pick the one that best suits your project. - Hardener
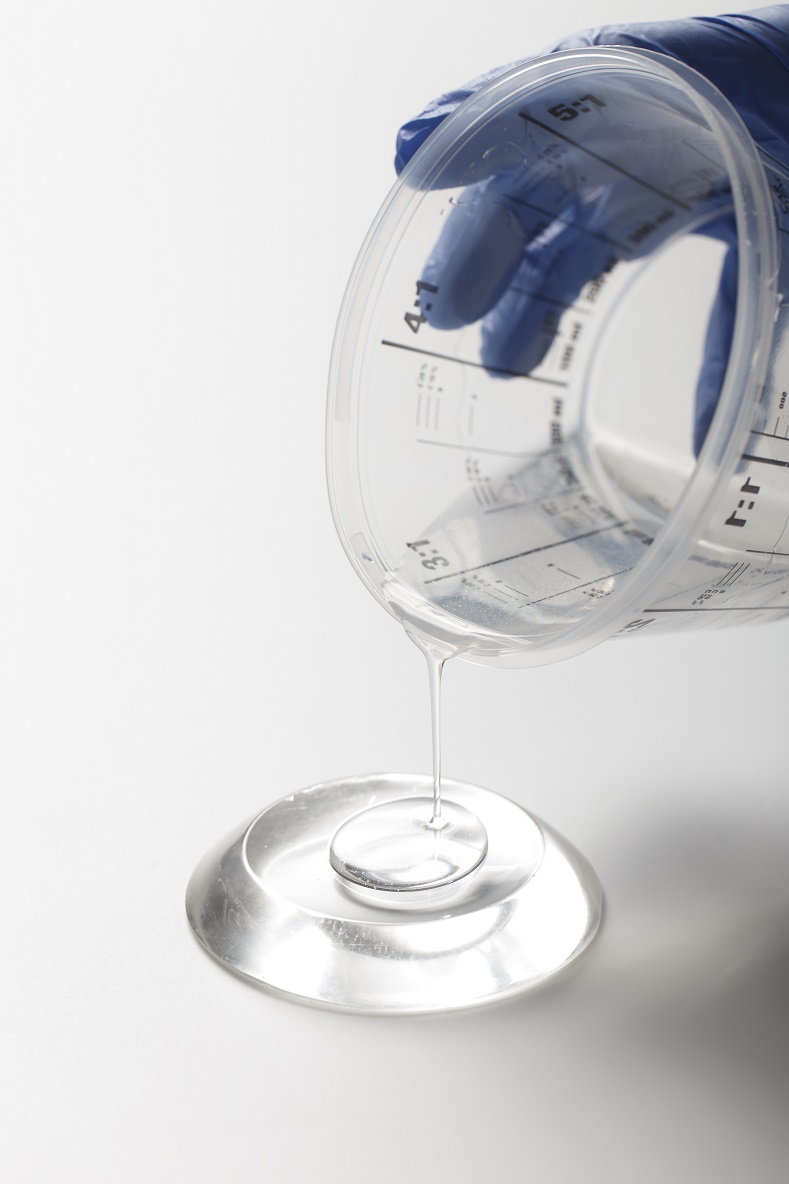
Epoxy resin is mixed with a hardener to cure it. Be sure to use the correct ratio indicated on the package. - Mixing cup and stirring stick
To mix the resin and hardener, you need a mixing cup and stirring stick. It is important to mix the resin and hardener thoroughly to get a homogeneous mix. - Sandpaper
If, after the epoxy has cured, you have sharp edges or unevenness in your piece, you may want to sand the surface. Therefore, it is handy to have sandpaper available. - Box cutter
You will need this to remove any excess epoxy. - Casting molds
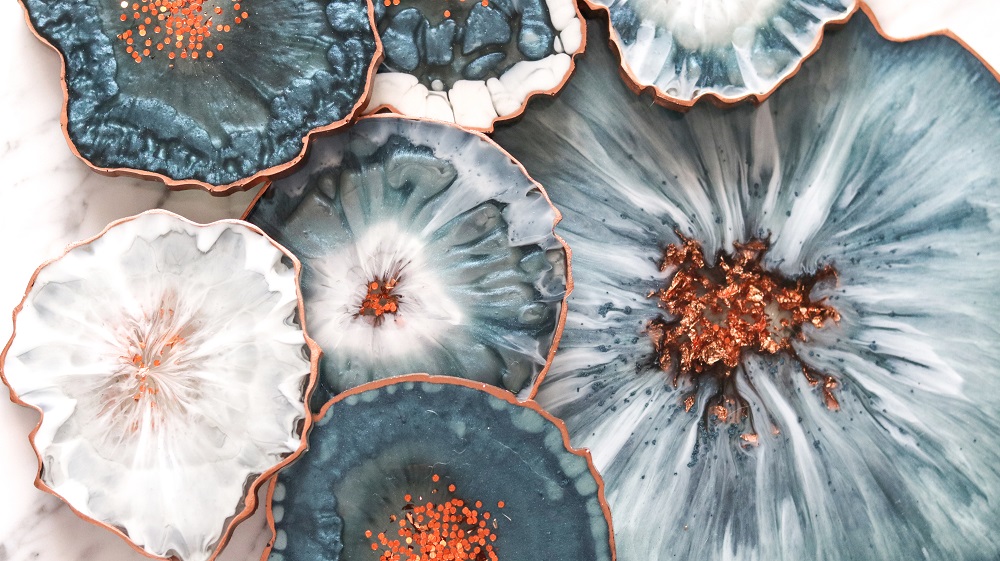
The great thing about casting epoxy is that you can experiment endlessly with shapes, colors and patterns. For example, you can pour multiple colors of epoxy into the same mold, or use a mold you made yourself from silicone rubber or another type of mold in plastic. The possibilities are endless! Note that epoxy sticks to paper or cardboard. This is why it is better not to use this. - A heat gun or lighter
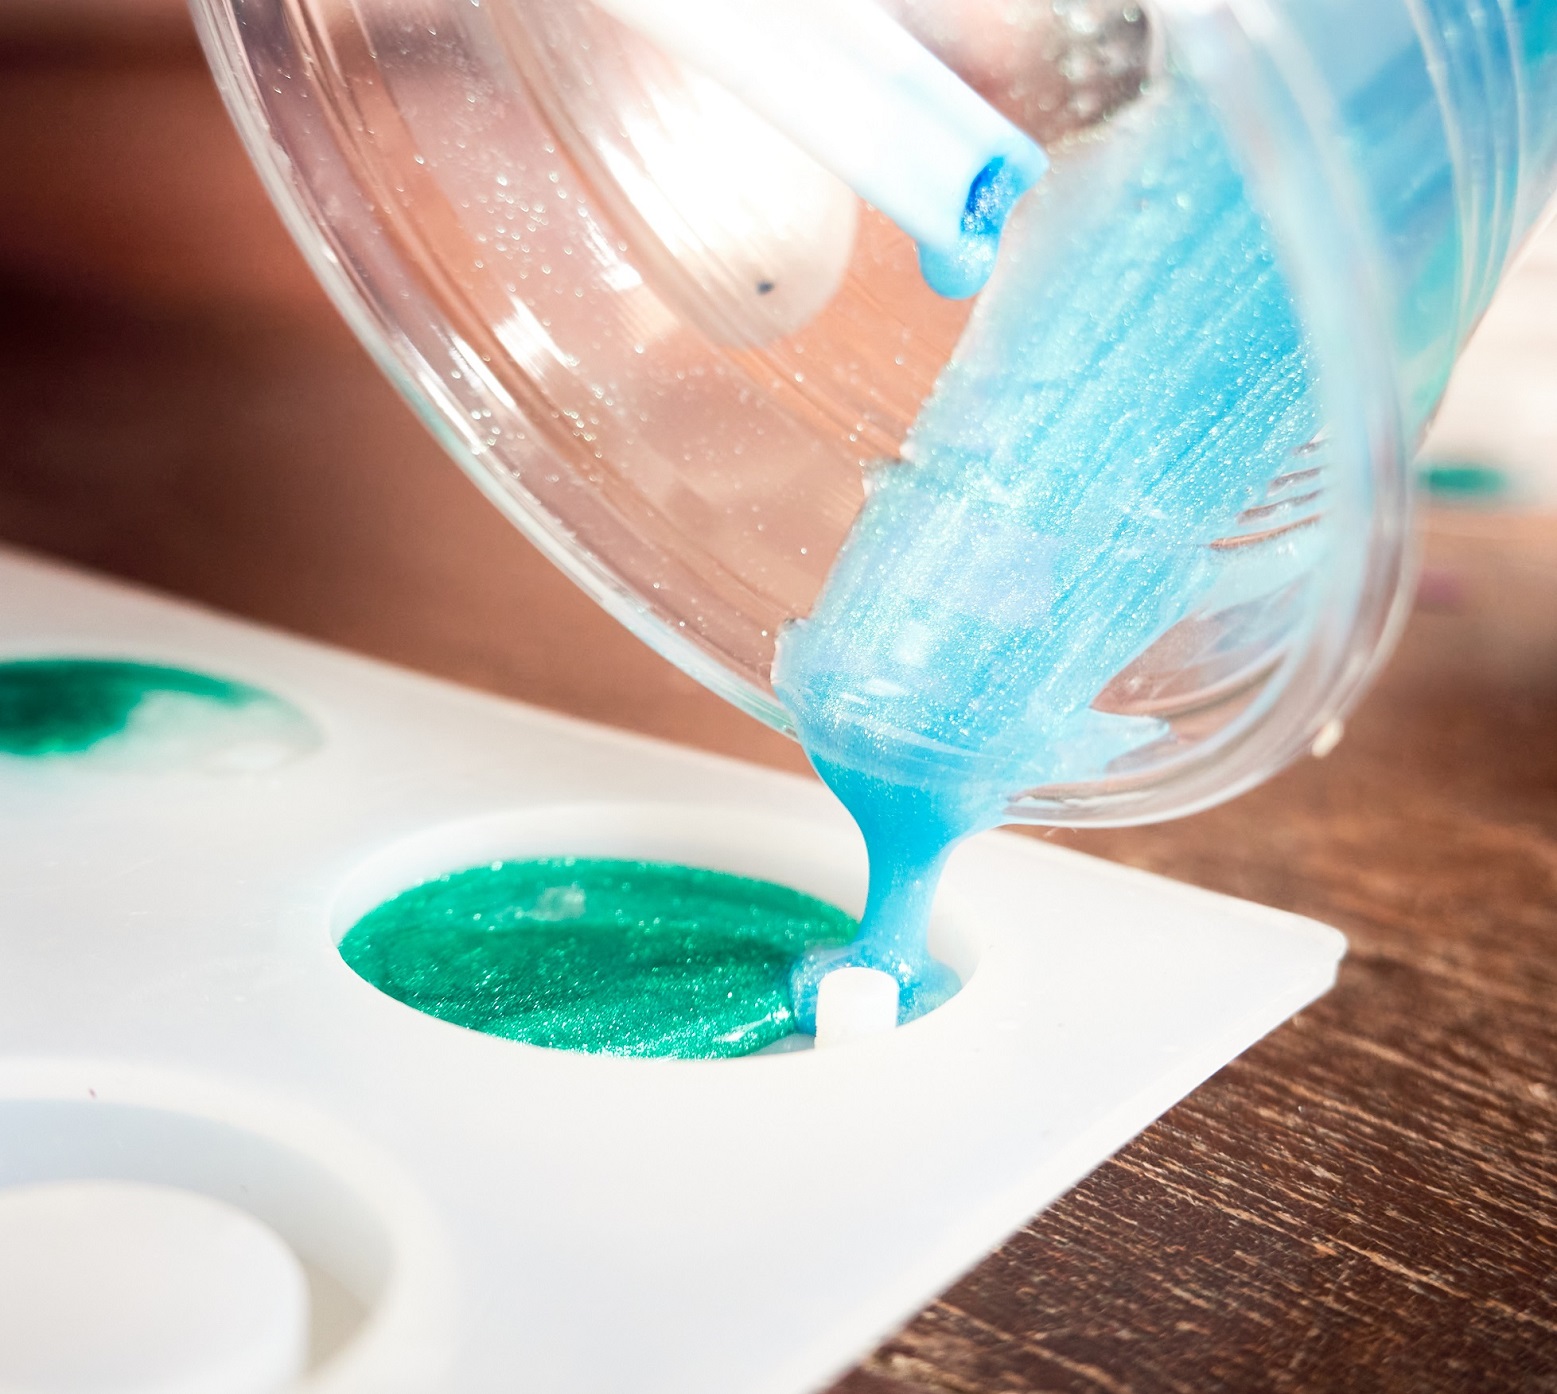
You can remove any air bubbles by using a heat gun or lighter to go over the epoxy. The heat will cause the air bubbles to rise to the surface and burst. Be careful not to burn the epoxy by holding the flame in one spot for too long. - Dyes or glitters
You can add special dyes or glitters to the epoxy mixture if you like. You can also experiment with adding different types of fabrics to your cast. For example, by using cellophane film, you can create the illusion of waves in water. - Personal Protective Equipment
When working with epoxy, it is important to take the necessary safety precautions. Therefore, always wear gloves and safety glasses.
How do I get started?
Now that you have all the materials you need, you can get started. Following is a step-by-step guide to casting epoxy:
Step 1: Preparation of the surface
Make sure the surface is clean and dry. For example, if you want to make a table top, it is important to sand the surface well and remove any stains.
Step 2: Mix the resin and hardener
Follow the instructions on the package to get the correct ratio. Pour the resin and hardener into a mixing cup and mix thoroughly with a stir stick. For large quantities, you may choose to use an electric mixer.
Step 3: Pour the epoxyPour the epoxy onto the prepared surface. Epoxy is self-leveling but if desired, you can use a spatula to spread the epoxy evenly over a large area. If you want to add multiple layers, wait until the first layer has cured before pouring the next layer. Remove any air bubbles as described above.
Step 4: Remove excess epoxy
If there is still excess epoxy on the edges, you can remove it with a box knife.
Step 5: You're done!Let your cast harden according to the specified time on the package. When it is fully cured, remove the piece from the mold. Now you can admire your original and beautiful creation.
As you can see the process of epoxy molding is really a piece of cake. You start by preparing the mold by loosening it and possibly filling it with spacers to create the thickness you want. Then you mix the epoxy casting resin according to the instructions and pour the mixture into the mold. Let it cure according to the recommended time and remove it from the mold. The result is a strong and shiny object that will last for years.
Epoxy casting is not only a fun and creative activity, it is also very easy. Because of its high strength and durability, epoxy is ideal for making countertops or tables or on floors in rooms that are used a lot. It is also a great way to cast in old or damaged items to give new life. Think of old oak furniture that has cracks or missing pieces.
So what are you waiting for?
Give it a try and be amazed by the possibilities of epoxy casting. You will see that it is a fun activity with which you can proudly create your own works of art. Unleash your creativity and create something unique with epoxy!
More Info
Feel free to contact us to receive more info about our products.